|
MEGADRIVE CHAMPIONSHIP SONIC THE HEDGEHOG 2
BOSS AND BADNIK GUIDE
If you haven't heard of Sonic the Hedgehog or played Sonic 2, then it is fair to say you have (1) been living under the biggest rock imaginable for the entire 1990's, (2) were born after 1995 and are therefore too young/foolish to know any better. Irrespective, if you fall into either of the above two categories, or (even worse) have played Sonic 2, but never completed it, the Mega Drive Championship boffins have produced this handy little boss and badnik guide to help overcome any difficulties Sonic 2 might give you.
Update (2013): In the numerous years since this guide was first invented, some very clever people on the Internet have produced significantly more advanced and detailed guides to the 2D Sonic the Hedgehog titles. While these could never diminish the sheer awesomeness and brilliance of our guide, for more 16-bit Sonicy related wholesomeness, we recommend Zone 0 a comprehensive study of all things Sonic.

EMERALD HILL ZONE
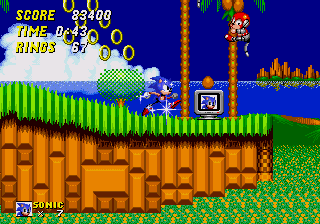
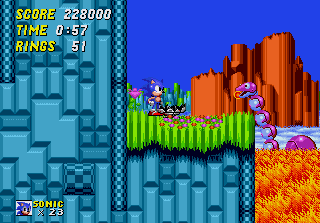
The bouncy green introduction to Sonic the Hedgehog 2 will lift your spirit with the first few seconds of cheerful music. Emerald Hill with very few hazards and docile badniks, there is plenty of opportunity to explore and experiment with Sonic’s abilities and the play area. There are little consequences at this stage of the game for getting Sonic sprinting at full pelt, but control of the Blue One will be an essential skill to progress later in the game. But, for now, enjoy the loops and mobious strips!
BADNIKS
Buzzer - This wasp like badnik pootles backwards and forwards across the screen and occasionally launches a fireball in your general direction. Slower and more cumbersome than their Green Hill Zone counterparts in Sonic 1, dispatch them quickly and these guys should cause no problems, dawdle and they will still cause little problem.
Difficulty: *
Coconuts - These monkey badniks lurk on trees and hurl coconuts. These are by far the most challenging enemy in the Emerald Hill, however, their range is poor and although they will scurry up the tree to try and survive, it really isn't difficult to dispatch them. Stand directly beneath them, wait for them to throw a coconut, attack. There is one really tricky git lurking in Zone 2, whose tree is just below a drop, and is just willing the unwary to hurtle into. An utterly awful variant appears in Angel Island Zone, in Sonic 3, whose projectile couldn't be any less designed to hit Sonic and it only has one - lame!
Difficulty: **
Masher - A fish like badnik that leaps up and down on bridges. Although visually they are slightly different, their behaviour is identical to their Green Hill Zone kin. While they are fast, the only hazard they should pose is hurtling the Blue One straight into them. Since they only ever occur at bridges, it makes sense never to run full pelt over a bridge until you've waited a few seconds to see if a Masher will leap up or not (or better yet jump across the bridge using the spin attack to destroy the badniks). It is always reasonably pleasant to attempt to kill all the Mashers on the same bridge in one jump and collect multiple points.
Difficulty: *
BOSS
Unlike the weight dodging difficulty of the Green Hill Zone, Sonic 2's first encounter with Robotnik is much more sedate. The boss descends from the sky and attaches to a vehicle on the ground with a spike at the front. Robotnik will then attempt to ram Sonic with the spike and, by ram, I mean roll lazily back and forth across the screen. Aside from total incompetence, there is no reason for this boss to cause any problems, the only danger comes from running into him or accidently hitting the spike. The play area is large, giving ample opportunity to chase any rings should Sonic take a hit, but this shouldn't be a problem. The quickest way to dispatch Robotnik is to come at him from behind and roll along with him. Victory is a formality, so enjoy popping the cage and releasing the cute things contained within.
Difficulty: *
2-PLAYER TIPS
Emerald Hill is a highly competitive level with plenty of rings and points up for grabs. Rushing to the finish line is also a straight forward task it is therefore important to grab what you can as quickly as you can because your opponent will likely be totting up their rings and points quickly too. It is, therefore, very important not to cross the finish line too quickly as doing this will give your opponent 60 valuable seconds during which time they will be able to roam around the fairly safe play area totting up their rings and points. Ensure the level is fairly empty before you choose to pass the post, a novice player will usually make this fundamental error, so be sure to take advantage!

CHEMICAL PLANT
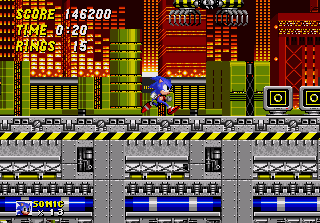
The Chemical Plant is a change of pace from Emerald Hill. Gone is the lush green landscape and instead Sonic enters Robotnik’s factory, with Act 2 filled with a polluted purple ooze. Long slopes will have Sonic quickly running at full speed and although badniks are not plentiful, those you will come across are a touch more challenging than their Emerald Hill counterparts. One section towards the end of Act 2 is fiendishly treacherous and the new hedgehog handler will probably find themselves killed a number of times, as Sonic attempts to climb a narrow passage of moving platforms as the chemical rises. This still being quite early in the game, rushing around at maximum velocity is not yet hazardous, so enjoy it!
BADNIKS
Grabber - These evil spiders lurk on the ceilings and drop down to take Sonic and Tails into their clutches once there they will flash red, explode and take away precious rings or lives. Generally, they are fairly easy to avoid, but if you see one then proceed with caution or speed to elude its grabs. Most guides are ignorant and state that if Tails and his moderate AI cannot save you then you are doomed - not true! Wriggle the left and right buttons rapidly to escape from Grabbers evil grasp.
Difficulty: **
Spiney - I have no idea what these badniks are meant to be, Dr R. was clearly feeling creative when he jotted these robots onto some blueprints. These beasts roam slowly across the floor/walls/ceiling and will occasionally fire a bullet towards our hero. While more a collision hazard than anything else, the bullet they fire can be an effective defensive tool, if it is launched at the time Sonic performs a spin attack or a roll. Generally, a good spin dash after they have launched a bullet, will burst these tricky little buggers open.
Difficulty: **
BOSS
Robotnik is back and he is considerably more fiendish than last time. Be very aware of the floor to the left and right hand side of the screen, which flips around to vanish, leaving a drop to instant death - try and stay in the middle of the screen. Robotnik flies in and starts pumping up the chemical into a contained, when this is full he will follow Sonic and attempt to drop the gunk on your head. Fortunately this attack can be avoided by simply ducking out the way. Eight hits will send Robotnik running. There is a very quick way to kill this boss and that involves jumping on him the moment he appears on screen and continually bouncing until he is destroyed. However, a note of caution is to ensure Tails is dead/flying/not AI controllable for this boss, otherwise you risk him hitting the boss and Sonic landing in a watery grave.
Difficulty: **

AQUATIC RUIN
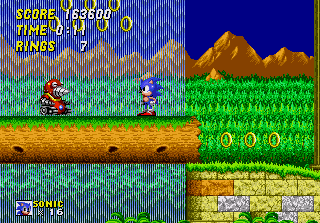
Out of the toxic factory and Sonic is once again surrounded by lush greenery of the Aquatic Ruin a decaying fortress partly submerged underwater. Unlike the Labyrinth Zone, the water sections can be avoided with some care. There are more badniks lurking around than in the Chemical Plant, but they are the more docile sort who shouldn’t cause too much difficulty. Losing control of Sonic in the Aquatic Ruin will often seem him colliding with enemies or submerged in the underwater sections, which are considerably more difficult. Sonic becomes very sluggish underwater, slow to accelerate and to slow down, air becomes a premium too so keep leaping into those big bubbles.
BADNIKS
Chomp-Chomp - These little blue fish might seem docile, swimming slowly backwards and forwards, but when Sonic gets close enough they will charge. Although movement underwater can be a tad cumbersome, there is nothing too challenging in avoiding these badniks, and once they have rushed off they will continue on that same trajectory - sometimes it is quite amusing to follow one for as long as possible.
Difficulty: *
Grounder - These red gits have an annoying habit of bursting from behind a wall and depriving you of your rings. Unlike the burrobots of Sonic 1, these guys don't have the ability to jump and will just meander across the playing field until they discover and obstacle and turn around. They have no further attacks than waiting for you to collide with them, so tempering Sonic's speed will be the best way to ensure safety against these.
Difficulty: **
Whisp - These fly badniks usually come in groups of 3 and have no other attack than ramming you. They are at their most dangerous when Sonic is off the ground either because of a spring or spring board, leaving him vulnerable. A simple spin-dash, however, will see these enemies simply fly into the Hedgehog and destroy themselves. Undestroyed and they will fly after you for a while and are not affected by obstacles, but they shouldn’t cause much, if any, trouble.
Difficulty: *
BOSS
There are two ways of defeating Robotnik in the Aquatic Ruin; (1) The quick way, (2) The stupid way. The quick way is to get on top of one of the two totem poles as they rise and, when they reach full height, leap across, hit the boss and bounce back to the top of the totem. Repeat this seven more times and victory will be yours. If, however, you fail to get to the top or fall back down to the ground, Sonic will have to contend with arrows flying from the totems whenever Robotnik gives them a wallop with his giant hammer. When the arrows land, you will be able to use them as platforms to either attack the boss directly or to scramble back to the top of the totem poles.
Difficulty: **

CASINO NIGHT
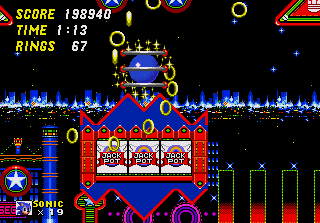
Sonic swaps the green lushness of Aquatic Ruin for the glitzy glamour of the sleepless Casino Night. Set in a Las Vegas surround, Sonic will bounce off bumpers, be propelled by flippers and springs and find himself in the numerous slot machines gambling his rings on the Jackpot. The entire play area is one big pinball machine and Sonic is the ball. Control can be troublesome and keeping hold of the hedgehog can be a challenge in itself, but fortunately hazards are occasional and rings are plentiful. There is just one rare badnik in the Casino Night and, on the very few occasions you come across him, he is incredibly docile and can be avoided with ease.
BADNIKS
Crawl - This slow little bugger can only be killed from a spin dash from the back. Any other attempted attack will cause the badnik to dispatch its bumper and bounce you away. While something of a rarity, Crawls tend to blend into the background and appear just when Ol' Blue has reached his maximum speed, but aside from that they really shouldn't be posing an advanced hedgehog handler any hassle. There are no other enemies in the Casino Night.
Difficulty: **
BOSS
This is a tricky encounter with Robotnik. While not quite the pinball machine of Collision Chaos in Sonic CD, this is a fast encounter which will make holding onto your rings a little difficult. The boss area is a U-shaped environment with a layer of flippers above the ground. Robotnik flies in above jump height, meaning Sonic must spin-dash up the walls or use the flippers to successfully score a hit and in the meantime Robotnik will either be trying to grab you with his grabbers or attempting to drop a nasty little bomb on you. The key objective is to keep a tight reign over Sonic in a small arena constantly trying to pull him out of control. The usual 8-hits will see the boss defeated.
Difficulty: ****
2-PLAYER TIPS
There is considerably more strategy involved in the Casino Night zone. Rings and points (excluding the slot machines) are considerably scarcer than in the Emerald Hill and the slot machines can be tricky to access and chew up time. Novice players will simply bounce around not really achieving anything, or spending too much time in the ring slot machines where a fortunate jackpot might give them an advantage. A good tactic to try and counter the luck of the slot machines is to try and always keep your ring tally higher than your opponent as you make your way through the level. A slightly more advanced tactic is to make a play for either rings or points and beat your opponent to the end. Luck can play its part in the Casino Night zone, but the skilled hedgehog handler should seldom find themselves defeated.

HILL TOP ZONE
The Hill Top Zone is set on a volcano and the temperature certainly starts to heat up here. Frequent pools of lava, plentiful spikes and more aggressive enemies will now start making a play for your rings. Act 2 will see Sonic in the heart of the volcano itself with lava rising beneath you and a frantic climb to prevent the Blue One being scorched. Luckily the level is quite blocky and numerous platforms and jumps will keep Sonic from sprinting headlong into destruction. Careful and considered control will allow you to progress through the Hill Top Zone relatively unscathed, although you might find yourself having to scramble for rings on occasion. Taking it steady is the best way to progress.
BADNIKS
Orbinaut – These little gits are more reminiscent of their Labyrinth Zone cousins than those of the Star Light or Launch Base zones. These are an extremely rare badnik who will sit at the top of a cliff and hurl their four orbiting fireballs towards you. Just like their earlier incarnations, once they have attacked then they are completely vulnerable and dispatching them should be easy.
Difficulty: **
Rexon – The Rexon itself isn’t too tricky as an opponent; the fireballs it spews from its mouth are extremely slow and weak. The badnik itself poses little threat as it merely wobbles back and forth, however, where the Rexon becomes a touch problematic is that they are always found in lava and one mistimed leap will see Sonic losing his rings. Fortunately the back of the Rexon serves as a stepping stone, which will remain after the head has been dispatched.
Difficulty: **
Spiker – These gitty things might appear slow and cumbersome, however, do not let their looks deceive you. That huge spike on the top of their heads is a projectile and one the badnik will launch upwards (or downwards if it is lurking on the roof) in an attempt to spike the Blue One. Sadly, this is quite an effective attack, however, on the plus side, once the Spiker has discharged its hat it is completely vulnerable and can be dispatched with ease – still, it is probably the most challenging enemy Sonic has come across to date.
Difficulty: ***
BOSS
There are two pools of lava in the boss area, with two platforms on either side of each, and Robotnik will emerge from one and shoot a fireball at you before retreating under the lava again and setting the two adjacent platforms alight momentarily. The cheap way to kill the boss (assuming you have a shield or rings remaining) is to leap on him when he first emerges, get in all 8-hits and then fall into the lava pool. While this encounter might test your hedgehog handling, in truth, it isn’t overly taxing.
Difficulty: ***

MYSTIC CAVE ZONE
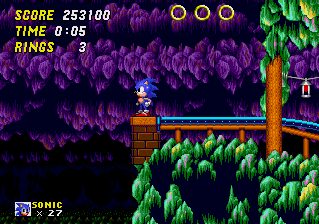
The backstory is that Robotnik has been digging for the Chaos Emeralds and in this eerie underground mine Sonic continues his quest. The Mystic Cave Zone is the first challenging level Sonic will come across, numerous traps, obstacles, spikes and badniks litter the play area. In order to reach the Mystic Cave you must possess good hedgehog handling abilities, but even they might not be enough to save you here as the ante is truly raised. Zone 1 is a little bit more linear than zone 2, which has numerous branches to explore. The lower route in both levels is probably slightly more hazardous, with vast spike pits waiting to claim the lives of the unwary and inexperienced.
BADNIKS
Crawford – These ugly blue worm things wait patiently in the walls and floor, until Sonic gets too close, then they launch themselves, head first, at the Blue One, causing damage if they hit and the hedgehog is not in a ball. The badnik will stay for a moment before retracting back to its original position and launching again. The trick to defeating these is to be in a spin at the time of their attack. Not the most difficult of badniks, but can certainly catch the unwary out.
Difficulty: **
Flasher – These horrible little gits will float around aimlessly and slowly just waiting for a Blue Hedgehog to come clattering into them. The flasher possesses a unique attack in so much as it will pause and then start flashing – any spin attack will not be successful when the badnik is flashing and, worse, it will hurt Sonic. Once the attack has finished then the flasher will begin to move again and now is the time to attack. Quite problematic, even the most experienced hedgehog handler can find themselves losing rings against this foe.
Difficulty: ****
BOSS
The boss area is quite a narrow one and upon entering it rocks will begin falling from the roof. The rounded ones are of no consequence, but the spikes will damage Sonic. After a short time Robotnik himself descends and it is time to get a couple of hits in. He is armed with a double drill and upon landing will charge towards Sonic. This move, however, will leave him vulnerable to attack from the top and when he reached the side of the screen he will raise his drills and climb back to the top of the screen, once again causing rocks to fall from the roof. The pattern will repeat itself, but Robotnik himself shouldn’t cause too much trouble. One good word of advice, is avoid touching the final starpost of the zone, as should you die then there is no way to grab extra rings and you must defeat the boss without error.
Difficulty: ****
2-PLAYER TIPS
The Mystic Cave is the most difficult of all the 2-player Sonic 2 zones and it is advised to proceed with caution. Rings are not rare, however, they are offset by the number of nasties trying to take them from you. Prevent yourself from taking any hits will be a big advantage, as will avoiding the bottom route as there are slower and have much more dangerous combinations of spikes and hazards. Be cautious of the escapeless spike pit in zone 2, which will claim the life of every novice player and still pose a problem for the more experienced hedgehog handler.

OIL OCEAN ZONE
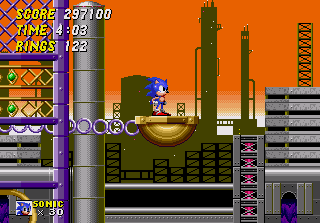
Robotnik’s oil refineries have turned the ocean a murky black, with the beat of the sun and the hot metal under his feet, the Blue One presses on into the most challenging level yet. The play area is adorned with traps and obstacles with little respite. Act 2 has longer runs that invite Sonic to pick up speed and hurtle to his doom. Should you fall into the Ocean at the very bottom of the level then Sonic will slowly sink until he either dies or jumps. The badniks are much more aggressive, especially Aquis, who seems intent on robbing you of your rings. Handling Sonic with care and proceeding with caution is the only way to stay alive.
BADNIKS
Octus - This pink octopus waits patiently for the player to appear before leaping up and firing. Broadly speaking, Octus poses a far greater collision hazard than his fireballs; often placed on a narrow ledge, or at the end of a straight tempting Sonic to run at full pelt into one, throw a fan into the equation and Octus is quite a nuisance. Non-the-less, aside from his jump, Octus is a stationary badnik and this vulnerability can be exploited easily with a touch of caution.
Difficulty: ***
Aquis - These seahorse badniks are the biggest challenge in the Oil Ocean Zone and their fast-moving bullets seem to have Sonic's name on them. The safest place to be is directly under them and out the way of their attacks, however, getting there in the first place is no easy task. Tempering Sonic’s speed slightly will give you the best advantage in avoiding their bullets and where there is a gradual slope inviting you to sprint at full pelt, proceed with caution.
Difficulty: *****
BOSS
Two platforms hang over a pit of oil in the middle and it is from here that Robotnik will make his play. There are three stages in his attack, firstly Robotnik will emerge from the oil allowing the Blue One to get a couple of hits in. After that the fiend send out a laser which will fire three beams at you before a metal claw comes flying out of the oil towards whichever platform you are one – although fortunately only the head does any damage. The cheap way to beat the boss is, after Robotnik disappears beneath the oil, fall into the gunk and hide beneath the platform where neither the hook or laser can reach. After the treachery of the Oil Ocean the boss is something of an anti-climax.
Difficulty: ***

METROPOLIS ZONE
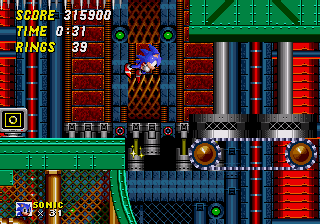
You have now made it into the heart of Robotnik’s factory and the entire terrain is hostile. Spikes, lava, spikes, crushers and long slopes downwards will tempt Sonic to run just that little bit too fast, will push every one of your skills to the limit. The badniks in the Metropolis Zone are tricky little menaces and are placed just in the position to give Sonic hassle. Keep those palms free of sweat and focus on staying alive. There are also three zones here instead of the usual two.
BADNIKS
Asteron - these little gitty star gits lurk in walls and ceiling waiting for the Blue One to wander by. Once activated they will move towards you for a couple of seconds before exploding into 5-fast moving spikes. Asterons pose their biggest threat where you are busy navigating some of the more treacherous parts of the play area. While they can be burst like normal badniks, they are usually behind a wall - rendering them safe from spin attacks.
Difficulty: ****
Shellcracker - A tricky crab like git that likes to lurk near the edge of platforms and hit Sonic when he lands. Falling from a platform presents other challenges. Attacking this horrible creature is no easy just either and unless you come at it from the back, there is no guarantee Sonic will not take a hit. Generally hateful, darned difficult, but fortunately the rarest of the three enemies, although more abundant in Zone 2 than the others. Shellcracker is one of the toughest badniks in game.
Difficulty: *****
Slicer - Ugggh, these nightmares wait for you to draw near and hurl their detachable arms at Sonic. They will follow Sonic for a while before falling to earth. Fortunately once they have fallen, the Slicer is defenceless – unless you are stupid enough to run into it – and will stand motionless waiting to be destroyed. At times, this game will prove just how much it hates you, placing slicers in the most treacherous positions imaginable. There are also two sections in Zone 3 which has Slicers on the roof; now that's just odd!
Difficulty: *****
BOSS
The Metropolis Zone in itself is an endurance test, with three zones as opposed to the usual two, but Robotnik waits with his most difficult contraption yet. Surrounded by eight-orbs that swing around his egg-o-matic, touching these will cause a loss or rings or life. It is important to hit the Boss at the moment the orbs do not obstruct, which is far easier said than done.
Provided you enter this encounter with plenty of rings, the odds of beating Robotnik increase dramatically. One by one, each hit causes an orb to transform into a replica of Robotnik, which require a further hit to burst. Once all the orbs are destroyed, Robotnik's last attack is to shoot lasers, but one final strike will end this fight.
Difficulty: *****

SKY CHASE ZONE
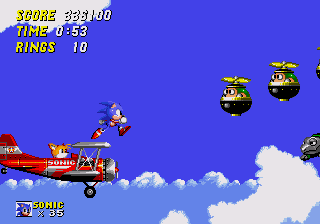
The Sky Chase offers a respite between the Metropolis and Wing Fortress zones and is highly impressive for its novelty, which would be repeated in later titles – Sonic is on top of a bi-plane and Tails is his piolet as the pair trek across the skies. The music is bright and cheerful and the level itself scrolls casually along. The Sky Chase is not without its adversaries; there are a considerable number of badniks patrolling the level, but in contrast to the proceeding levels, this should cause no problems. There is also no boss to face at the end – yay!
BADNIKS
Bilkanry - Woosh! These speedy aeroplanes rush across the screen, ok, they aren't that fast and only really cause a problem when you are trying to take out other enemies, or appear in multiples. They can also be a useful way to tot up your score and show off at the same time.
Difficulty: **
Nebula - The egg shaped badniks lurk in the sky. Upon getting close they rise upwards and drop a bomb. While not the fastest enemy, they can be a significant nuisance, with the biggest danger leaping upwards into them. Nebulas often loiter in threes, meaning you can take advantage of the points multiplier to tot up your score.
Difficulty: ***
Turtleoids - This badnik comprises of two halves; the large turtle beneath, which will shoot a slow bullet across the screen, and the smaller turtle rider, which is the one to attack, leaving the large one below floating redundantly. Generally, due to their slow speed, these creatures will cause only a limited amount of problems, although can prove a bit more tricky when in multiples and with either Nebulas or Bilkanrys. Near the end of the Zone there are two Turtleoids at the bottom of the screen which cannot be killed - strange.
Difficulty: **

WING FORTRESS ZONE
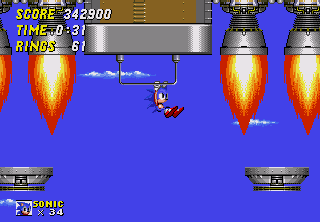
The penultimate level is set on Robotnik’s giant sky fortress and the defences are primed for the arrival of the Blue One. Wipe the sweat from your palms as you grapple with the difficult traverse across the play area where one wrong move, or misplaced jump, will see Sonic falling to his doom. Rings are plentiful and the hazards frequent, but no amount of rings will save Sonic should he carelessly slip from a platform. Even the music itself, somewhat regal in its beat, seems to reflect this endurance test and final push towards the Death Egg.
Clucker - the word git has perhaps been overused in this guide, but these badniks are gits. Numerous turrets litter the Wing Fortress and a Clucker will invariably spring out and begin firing eggs at Sonic. Fortunately these little gits only fire in one direction and have no defence, so a rapid despatch will ensure no ring loss. Luckily there aren't many Cluckers in awkward positions and the fact you'll see the turret well before the badnik attacks gives ample opportunity to react.
Difficulty: ***
BOSS
Robotnik is back and at his most fiendish. You drop down into the boss area and are trapped between two lasers. There are 3 rings in the boss chamber and the wise hedgehog handler with avoid collecting them until their ring tally is at ‘0’. A beam then comes from the roof, following by three moving spiked platforms, which bob around the play area. The beam is the target of your spin attacks and it requires eight hits to destroy, however, the damn thing is just that little too high to reach from the ground - hence the spiked platforms. This is not an easy encounter, so wipe the sweat from your palms and leap onto the spiked platforms and attempt to land a hit on the beam, while avoiding the other spiked platforms and the laser itself. After 8-hits everything explodes and Dr Robotnik flees towards the Death Egg. There is an extra life hidden in the alcove opposite the boss fight, which Sonic can collect before the cutscene takes the Blue One to the final level.
Difficulty: *****

DEATH EGG ZONE
Robotnik has escaped into his final base, the orbiting spaceship, the Death Egg. Without any rings, Sonic cannot risk a single error, his very life is at stake and there is no mercy here. The level is divided into two boss fights, firstly Sonic will face a metal replica of himself before the final showdown with Robotnik in his giant Robotnik machine. No game before could claim such an epic last stand and few since have matched this encounter. It is time to wipe the sweat from the palms one last time, take a final deep breath and take the plunge headfirst.
BOSSES
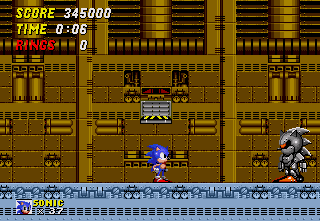
Silver Sonic - Before the final battle with Robotnik, Sonic must face a metal replica of himself. Ordinarily such an enemy wouldn't cause any major problems, however, the unforgiving nature of the Death Egg means any mistake is deadly. It is safe to hit the Silver Sonic on his forehead, but do not touch the hedgehog spikes. This sub-boss descends from the right, conventionally you can get three hits on his forehead before he rolls into a ball and rushes across the screen, however, it is advised to spin dash beneath him and get four hits in. After Silver Sonic has attacked he will pause for a few seconds giving you the opportunity to get three more hits in, after the sub-boss charges twice across the screen.
Difficulty: *****
Final Boss – After a small chase, Robotnik will climb into a massive machine that has a devilish resemblance to our antagonist. Touching the legs, spiked arms or flame at the back will cause instant to death to Sonic, as the mech strides across the screen before leaping into the air. A crosshair will follow Sonic around and when it locks on, Robotnik falls down to earth, crushing the Blue One if he has not moved. When Robotnik lands he will fall forwards and this is the perfect chance to get a hit in. Afterwards Robotnik will alternatively either fire his arms out towards Sonic or march across the screen. If Sonic jumps to his full height it is possible to hit Robotnik when standing (although more difficult when walking as his spiked arm reaches out slightly). It will take 12-hits to dispatch this final boss.
Difficulty: *****
Mega Drive Championship Archive
| 